Tag Archives: energy

Cool in the summer part II – Its the humidity

It's not the heat, it's the humidity! Photo courtesy TheKarenD. Some rights reserved.

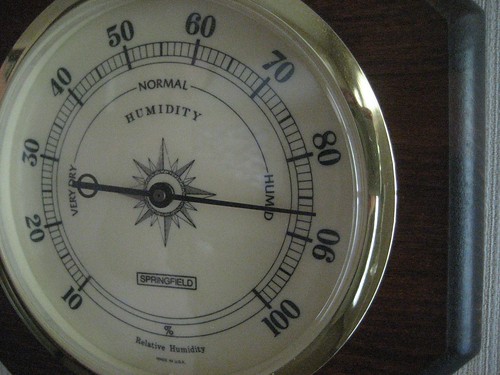
That annoying saying, “it’s not the heat, it’s the humidity” is true. The heat wave we’re currently experiencing in Arlington is a double-whammy with high heat and high humidity (humidity was over 90% Saturday morning around 6 am.)

What to do?

To remove humidity from the house there is only one energy efficient alternative to an air conditioner or dehumidifier, but there are some important things you can do to prevent your home from becoming more humid.

The most efficient way to reduce humidity is to open a window, as long as it is dryer outside than inside. Even during heat waves (in MA) the overnight temperatures will usually drop, but humidity goes up. Environmentally, it’s a better deal to open your windows for the cool air and turn the AC off. Your air conditioner or dehumidifier are the only choices to reduce humidity in really sticky weather, especially during the heat of the day.

How to keep your home from getting more humid.

  1. Run your exhaust fans. When you shower or cook with gas, you release water molecules into the air -the last thing you want to do in a heat wave. (It also adds various unhealthy gases.) Turn on the exhaust fan while showering/cooking and make sure it stays on for several minutes after you’re done. Make sure your fan exhausts outside rather than into your attic, which creates a mold issue. If you don’t have an exhaust fan get one soon, your home will thank you.
  2. If it is still hot and humid in the morning, then contrary to what I said in a previous post,  keep those windows closed. Most online weather sites will tell you the humidity outside.
  3. Buy a hygrometer. Hygrometers (commonly, but incorrectly, referred to as hydrometers) measure the humidity in your home. Unfortunately the inexpensive models seem to be of poor quality. I’ve found them to be off by as much as 10% when testing them (testing/calibrating requires only salt and water, Google: calibrate hygrometer). You can buy decent digital models for around $20.
  4. Dehumidify. Depending on which “expert” you listen to your indoor humidity should be between 30-60%. This keeps your home more comfortable and prevents mold from growing. Dehumidifiers are costly to run but less expensive than mold damage or health issues. Unfortunately dehumidifiers produce heat, so during heat waves they’re best left in the basement.
  5. Air conditioners don’t just cool the air, they take moisture out. Use them wisely, set them at high temperatures (75+), and try to use all the energy saving methods listed earlier first.

-Jeremy

Cool in the summer part III-Insulation & Weatherization

Photo courtesy Ian Haycox, some rights reserved

Admittedly, thinking about insulation or weatherization in the summer is something we’re not accustomed to.  In the winter we think about all the heat lost, in the summer we want to lose more of it.

Insulation and weatherization are, however, critical in the summer to keeping cool air in and hot air out. If you haven’t yet, take a few moments to read the earlier Cool in the Summer piece.

Now here’s another quick experiment – On a hot day go from a well insulated but not air conditioned home into a shed to feel the temperature difference. If your shed is like most, on a hot day it is enough to make you want to pass out. The reason the shed is so much hotter? No insulation and no air-seal.

Insulation in the home, especially the attic, is critical during the hot days of summer. Roof temperatures can be well in excess of 100 degrees, which then transfer into the living space. (It also speeds deterioration of many roofing products. )

Insulation provides a barrier between your living areas and the blistering hot roof. It keeps the hot out and the cool in.  The same goes for walls, especially south and west facing walls. The more insulation (properly installed, of course) the better.

Weatherization or air-sealing is of at least equal, if not greater importance. Why? Think about an insulated thermos holding iced tea at the beach. It’s going to do a good job, even in the hot sun, unless you leave the cap off, right? If you leave that thermos open you’re going to have hot tea in just a few minutes.

Same goes for your house. If you insulate it but have gaps, cracks and holes everywhere then all your cool air is going to go out, and the hot air in. That’s a waste of money, energy and comfort.

Finding leaks in the summer isn’t as easy as it is in the winter due to temperature and pressure differences (in the winter cold air comes billowing in, making it easy to walk inside the house to find leaks) but is possible. By contrast, in summer it is usually more comfortable to do much of the sealing work that should be done on the exterior such as door frames, window exteriors, basement penetrations and so on. Many caulks require temperatures be above 40 degrees, so now is a good time to use those.

What can I do now?

You may recall which rooms were uncomfortable during the winter – start there.  Look for leaks around the windows, which are often installed improperly. Go around the perimeter of your house, twice – once looking down and once looking up.

First look at your foundation for various penetrations, especially where utilities (gas, water, electrical and cable) come in. Caulk and foam those as needed. Check the windows in your foundation too – where the frame meets the foundation, for gaps you can easily seal with some caulk.

Second pass look up, perhaps with a pair of binoculars if you’ve got some.

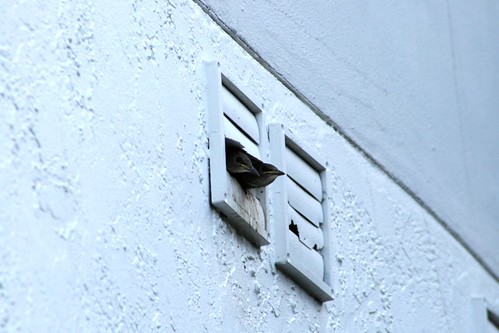
Broken exhaust flappers let outside air, and wildlife, in. Photo courtesy ureen Leong-Kee, some rights reserved.

Look where your windows meet the siding. Is there a gap that should be caulked? Are there any utility penetrations up there that should be sealed? Is there an exhaust vent improperly sealed or with the “flapper” stuck open?

Insulating the attic in the summer is not a good idea for most homeowners. Aside from the usual concerns with dust and stepping in the wrong place it is hot, brutally hot. Another benefit of leaving it to the pros is that there are tax incentives to get insulation done. You can find MA specific incentives through Mass Save.

-Jeremy

Cool in the summer

Heat Wave

Photo courtesy Steve Johnson, some rights reserved.

The blog is woefully out of date, but after having gone through one heat wave and about to enter another (with higher humidity) it seems time to add some information about keeping cool in an Arlington summer in an energy efficient manner.

You’re likely familiar with the somewhat annoying adage “It’s not the heat, it’s the humidity.” It’s annoying but true, and an important part of how to keep cool in this weather. (Its also the subject of the next post.)

Keep the heat out, let the cool in.

This seems obvious but home comfort sometimes works in mysterious ways. When cooler weather is predicted at night and early morning open the windows. Before you leave for work, or before the sun burns off the haze, close the windows – all of them. You want to trap that cooler air inside the house. Open windows may provide a breeze but they’ll also let in the hot, sticky air. Keep them closed until it starts to cool down at night. (Nights will be cooler but frequently humidity will rise. That’s generally okay, it’ll still be more comfortable.)

When you close the windows, close the shades.

Shades help stop ‘solar gain,’ or the heat that comes through the windows in the form of solar radiation. If you question how much heat comes in this way try an experiment. On a hot day close halfway a shade that gets midday or afternoon sun. After the sun has been coming through for an hour or two put your hand on a shaded portion of the floor or wall, then put your hand where the sun has been beating down. It is usually a very significant difference.

If you have thin shades that let too much light in, or don’t want to spend money on a new set of shades, try this: I went to my local fabric store (Fabric Corner) and purchased “light blocking” shade material for $9 per square yard. For another $3 I purchased some thumb tacks. I took the material home, cut it to size and tacked them in place. Pull any existing shades down over these and the tacked-on shade becomes almost invisible. When the heat wave goes away, so do the light blocking shades (stored for later use). This has made a huge difference in the temperature and comfort of those rooms.

Stop the sun outside if possible.

Of course, if you can stop the sun on the outside, rather than inside with a shade, that’s even better. We’re all familiar with the idea that a deciduous tree is a great idea as it blocks the sun in the summer, but leaves fall and let light (and heat) through in the winter.

There are also, however, shades (and awnings) that can go outside to block the sun. I haven’t seen these locally but if you search online for exterior shades or outdoor shades you’ll find many options.

In my house I have a domed skylight which due to spacing issues wouldn’t allow a shade to be placed on the inside. Even before the first heat wave hit, a thermometer just under the skylight measured more than 120 degrees! So I went online and purchased some exterior-grade solar blocking material and attached it on the outside. Since then it hasn’t gone above 90. (This was more expensive, about $30 for a 4’x5′ piece, more on this in a later post.)

Keep the air moving on people, not things.

As you probably know, ceiling and other fans are great at cooling people off. As I type this I’m sitting, quite comfortably, under one while the temperature is 82 degrees, humidity is 67% and according to the online sites it “feels like” 86 degrees.

Fans, however, are often wasted electricity because people leave them running while nobody is in the room. Fans make you feel comfortable by moving your own heat away from you and by evaporating perspiration. They do NOT cool a room – they cool you. That means that if you’re leaving the room, turn off the fan.

Air conditioning.

Of course, there are times where air conditioning really is going to be wanted. If you’re someone who needs cooler temperatures then the above will help, but perhaps not completely, eliminate the need for AC. If you do turn it on remember to use it wisely. If you’ve got window units, put them in shaded windows if possible (but not where air cannot flow well.) Set the temperature to warmer settings to save energy – try edging the temperature down, over a few hours, to see the warmest temperature you feel comfortable.

These are just a few quick hints. If you’ve got others that work well please add them in the comments below.

-Jeremy

One barnraising down, one entire town to go

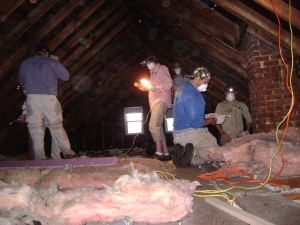
September was our first “barnraising,” or weatherization event.  Forty people came together on a cold rainy day to seal up a low-income two-family home run by the Housing Corporation of Arlington.

Morning meeting
We had forty people working on this house.

First floor unit:
We went from 3289 cfm to 2863 cfm – a decrease of 12.9%
Equivalent hole size was 327 square inches and went down to 270 square inches – a reduction of 17.4%

Second floor unit:
We went from 3532 cfm to 2668 cfm – a decrease of 24.4%
Equivalent hole size went from 352 square inches to 240 square inches – a reduction of 31.8%!!!!!!

This obviously doesn’t even include the reductions in energy usage that will be seen due to wrapping the pipes and water tanks, or electricity reduction due to the CFLs.

Sealing the attic
A huge hole near chimney led to second unit’s closet. It was sealed with aluminum and stove paste.
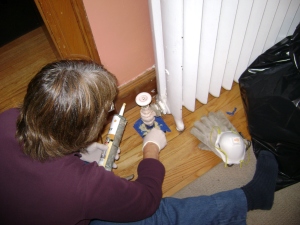
Sealing radiator penetration
Regardless what we did the basement would be cold, and that was coming up to the first floor. We first filled the gap with rock wool (which can take high heats) as backer then capped it off with fire-barrier caulk. Blue tape is there to protect floor while working.
Q-Lon
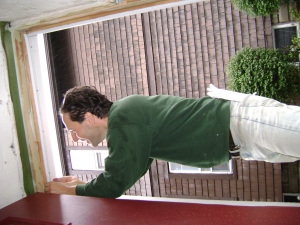
Q-lon was already installed, wrong, by someone else. We fixed it. (Though I can’t fix this photo so it is vertical.)
> First floor unit:
>
> We went from 3289 cfm to 2863 cfm – a decrease of 12.9%
>
> Equivalent hole size was 327 square inches and went down to 270
> square inches – a reduction of 17.4%
>
>
>
> Second floor unit:
>
> We went from 3532 cfm to 2668 cfm – a decrease of 24.4%
>
> Equivalent hole size went from 352 square inches to 240 square
> inches – a reduction of 31.8%!!!!!!
>
>
>
> This obviously doesn’t even include the reductions in energy usage
> that will be seen due to wrapping the pipes and water tanks, or
> electricity reduction due to the CFLs.