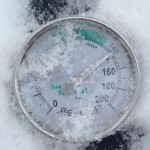
Thermometer is frosty, but inside the bin it is a cozy 140 F.
Winter composting always seems to confuse people, which is understandable.
So what is the secret to successful winter composting: Do the same things you do when composting the rest of the year, only faster.
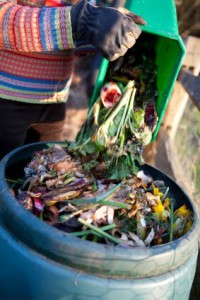
It’s that easy. If you want to keep your compost “hot” composting somewhere between 110-160 degrees through the winter, you need to add material almost daily. You also need to make sure you’re adding in the correct ratio – for every one container of food scraps (which is high in nitrogen), add two or three containers of carbon-rich items such as leaves, newspaper or used tissues. (“What is compostable” flowchart.)
To help things along, add a big bag of free used coffee grounds from your local coffee house every once in a while. They’re usually happy to hand them over, as to them it is just another bag of garbage.
If you do this, and occasionally aerate (turn) the compost with a shovel, pitchfork or drill and bulb auger, so the microbes can get air, your pile will stay hot throughout the winter.

My compost is full – now what?!?
Until the compost is full. Or maybe it froze solid. Now what?
You’ve got at least four basic options:
1. Installing another compost bin is perhaps the easiest solution. Regardless the time of year, you’ll eventually fill your compost bin, right? Despite the pile shrinking 1/3 to ½ as it decomposes, it isn’t bottomless. If you’re starting this pile in the middle of winter, it may not heat up for a while, but it’ll get there eventually, and it should provide enough space that even if it freezes, it can hold a lot of material until things warm up. (Most towns in MA, including Arlington, sell discounted units for around $40-$50.)
2. Find a friend with space in their compost bin. They may specify what they’re willing to accept (eg, no bread or rice), but it is a great way to keep the cycle alive and maybe next winter they’ll repay the favor.

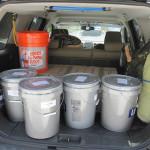
Yeah, buckets like these. (Photo courtesy Jeff Hester, Creative Commons, Some Rights Reserved.)
3. Get some buckets with lids from the hardware store or your favorite restaurant. Place your food scraps in the bucket and place them outside, where it is already freezing, so the food doesn’t rot and stink. It’s a good idea to add some carbon (leaves, newspaper or tissues) as well so if it does begin to decompose before you empty it, the pail won’t stink. You can do the same method with a small metal trash can (with bungee across the top to keep critters out) or a screw-top lid adapter from Leaktite, available for less than $10. (I haven’t tried this, so if you do, please leave a comment with information about how it works for you!)
4. Vermicomposting (worm composting) indoors can be fun and easy. Typically in the basement and requiring only a little space, a worm bin can go through a small family’s food fast enough to keep your food out of the waste stream all winter long without a single trip to your outdoor compost bin. Vermicomposting is different enough from outdoor composting that I typically don’t address it, but there is a lot of great information available from reputable sites, including the MA DEP, which also addresses the size bin you need based on the size of your family.
I will add one final and important note: Most people’s compost piles freeze in the winter. If yours does, don’t worry about it. As long as you added the correct ratio of one part nitrogen (food scraps) to two or three parts carbon (leaves, newspaper or tissues), you’ll be in excellent position come springtime. When the air warms, the compost pile microbes will swing into action, heating your pile rapidly. When it does, remember to aerate it!
(A short and unfortunately blurry video I made one very cold morning at the compost.)
